How to render a SketchUp model with AI
You do not need V-Ray, Enscape or a powerful computer to get a photorealistic image out of SketchUp. This guide shows how to go from a model view to a finished render in a few minutes, keeping your geometry exactly as you modelled it.
6 min read
What you will get
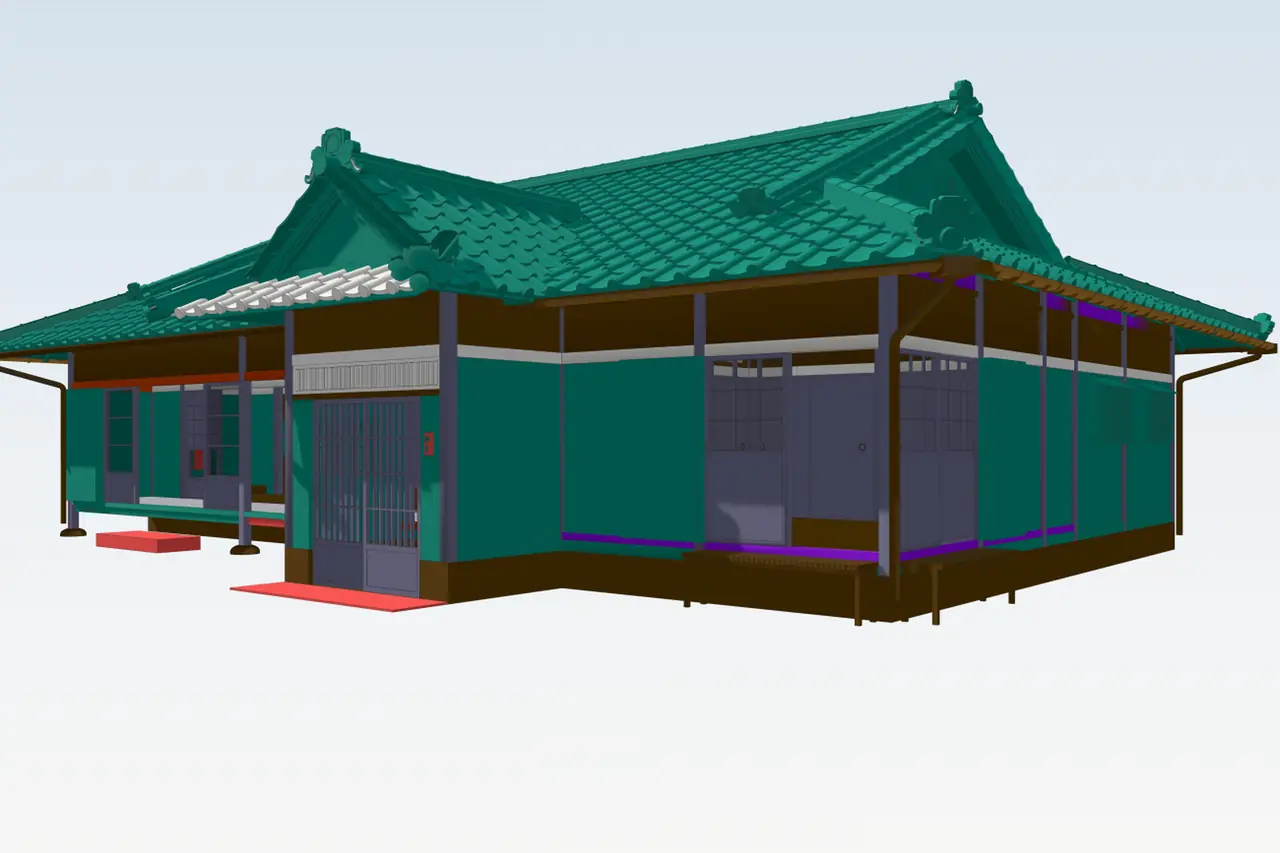
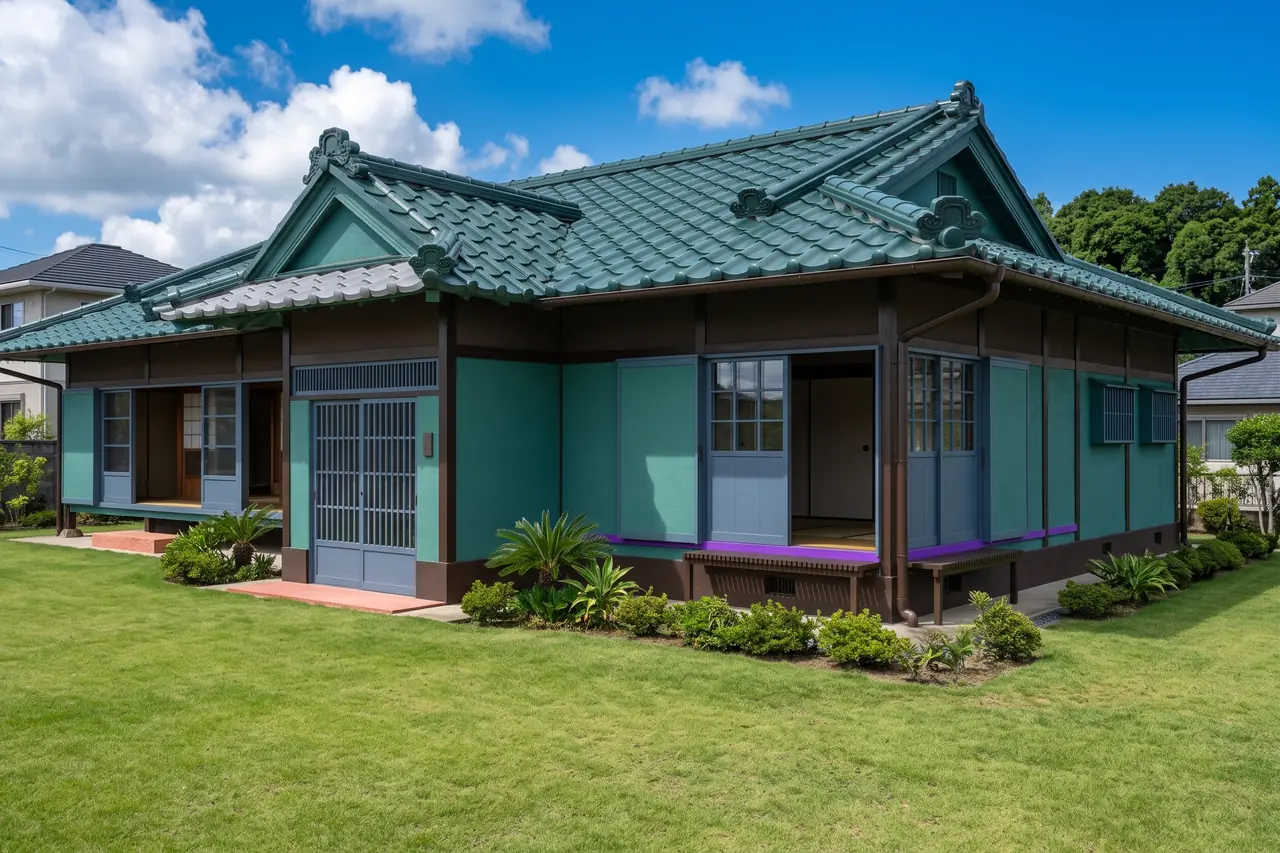
Drag the slider to compare before and after.
What you need
- A SketchUp model (any version, including SketchUp Free) or a screenshot of the view you want.
- A browser. Nothing to install and no graphics card needed.
- A free RendScene account (5 free renders, no credit card).
Step by step
- Step 1
Frame the view in SketchUp
Pick the camera you want to show. An eye-level view (about 1.6 m / 5 ft high) usually looks the most natural. Turn off guides, section planes and hidden geometry you do not want in the picture. Textures are optional: a white or untextured model works, and so does one with materials.
- Step 2
Export the view or upload the .skp file
Two ways: export an image with File › Export › 2D Graphic (or just take a screenshot), or upload the .skp file itself. When you upload the file, it opens in a 3D viewer in your browser and you choose the view there; the model is read in your browser and is not uploaded. In the studio, choose 3D model under Starting from.
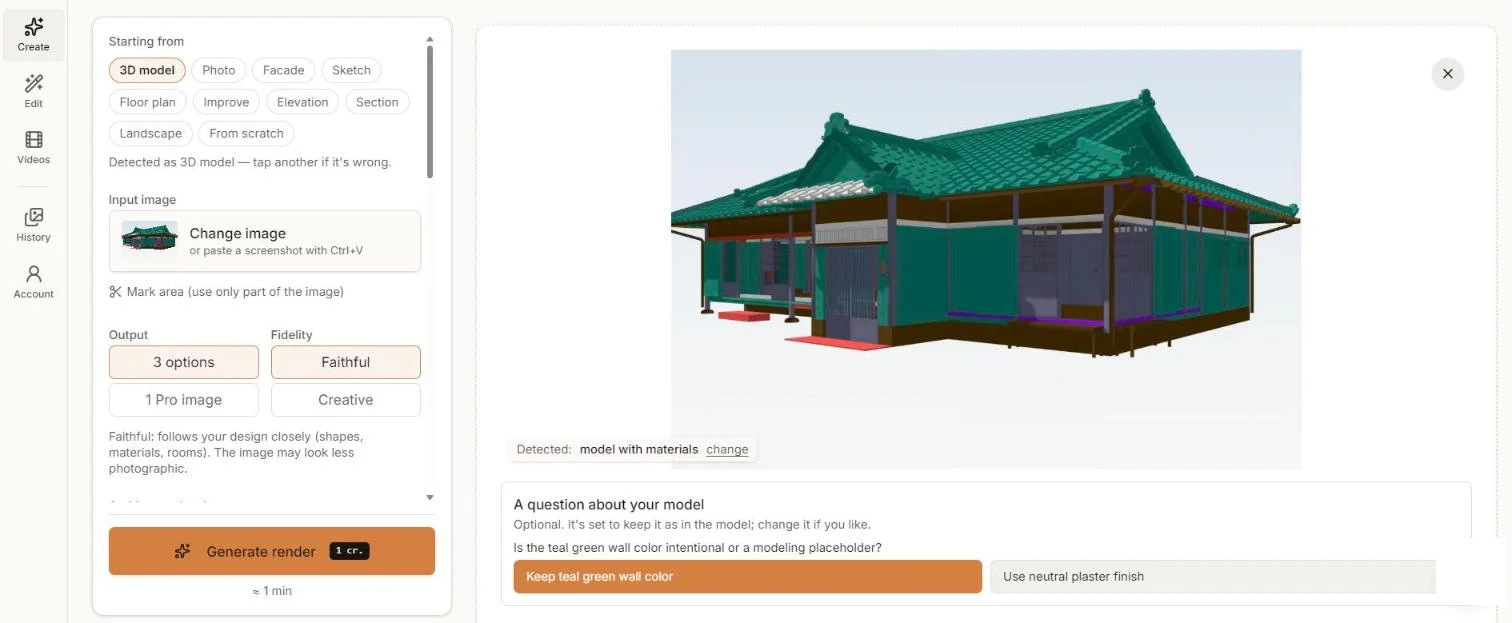
The SketchUp view in the studio. RendScene asked whether the teal walls were intentional before rendering. - Step 3
Choose fidelity and style
Faithful keeps shapes, materials and rooms as close as possible to your model. Creative lets the AI improve the picture more freely. Choose 3 options to compare several versions, or 1 Pro image. If your model has colours that might be placeholders, RendScene asks whether to keep them or use real materials. You can also pick an architectural style and write extra instructions, such as the time of day.
- Step 4
Generate and compare
Click Generate render. In about a minute you get your options side by side. Pick the one that best matches your idea.
- Step 5
Refine and download
Download in 2K or 4K. If one detail is off, open the image in Edit to change a material, add or remove an object, change the light or create more angles, without starting over.
Tips for better results
- Use an eye-level camera and a normal field of view. Very wide angles distort the result.
- Hide guides, axes, section cuts and layers you do not want rendered: what is in the image tends to appear in the render.
- If a colour in the model is only a placeholder, say so (or let the AI suggest materials). Otherwise Faithful keeps it.
- Want the same building in another light? Keep the view and write "golden hour" or "night" in the instructions.