Your floor plan, furnished and textured.
Upload a black-and-white floor plan exported as an image or PDF. The walls and layout stay exactly where you drew them; floors, furniture, materials and shadows are added on top.
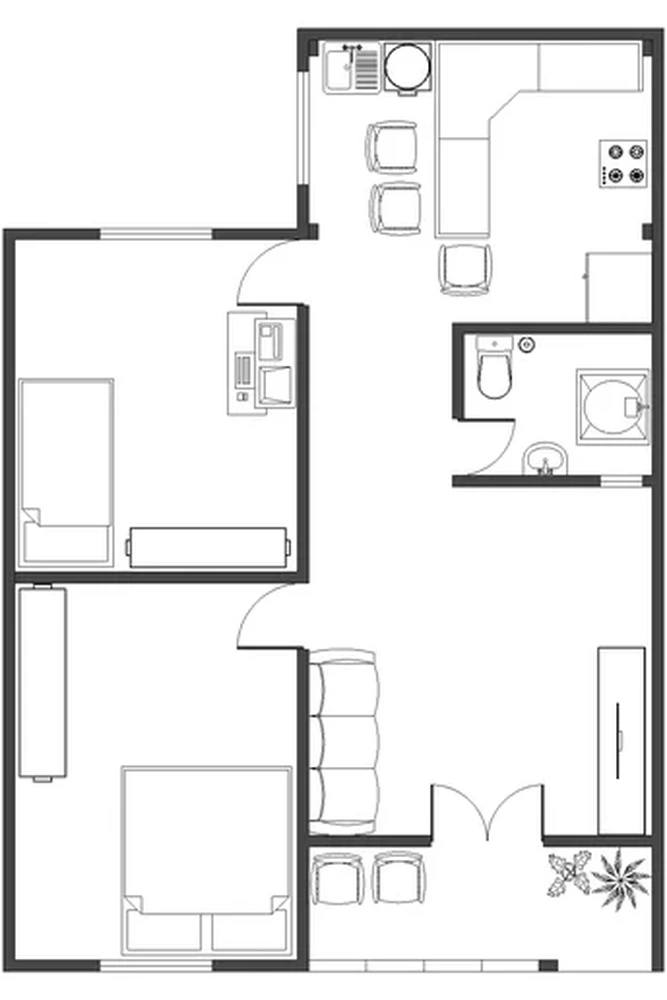
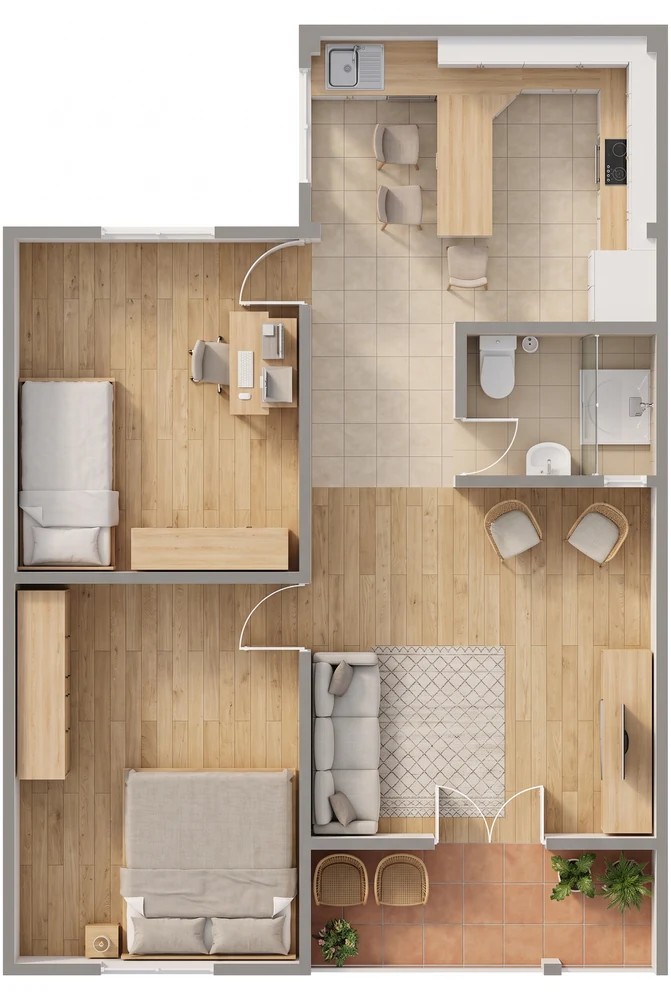
Before
After
Drag the handle to compare. Works with mouse and touch.
How it works
Floor plan to render in three steps.
Three steps. No 3D software, no learning curve.
- 1
Upload the plan
A black-and-white floor plan, exported as an image or PDF.
- 2
Pick a style
Choose finishes and furniture style, or keep it neutral.
- 3
Get a presentation plan
Top view with materials, furniture and shadows, ready for the client.
What you upload
What to send
- One plan per image, seen from above, on a plain white background — an export from CAD, Revit or ArchiCAD, or a clean scan.
- Send it without dimension lines, labels or title block when you can: text in the drawing can be read as an object.
- A PDF is fine: the plan is taken from the page as it is.
Accepted files: PNG, JPG, WEBP or PDF.
- What stays
- Every wall, door, window and room stays where you drew it. The footprint of the building does not change.
- What the AI adds
- Floor finishes, furniture for each room's use, materials, textiles and soft shadows, seen from above.
- Resolution
- Render natively in 2K or 4K, or upscale later from 2K to 4K
- After rendering
- Swap materials, remove and add objects without touching the rest of the image
- What this feature doesn't do
- Exact dimensions: the image is a presentation, not a construction document.
- A page with several drawings becomes a render of the whole page — crop one view per image.
- CAD or 3D files (DWG, DXF, SKP, RVT…) — send a screenshot, image or PDF.
Examples
The same plan, before and after.
Every pair below is a real RendScene render made from the image on the left.
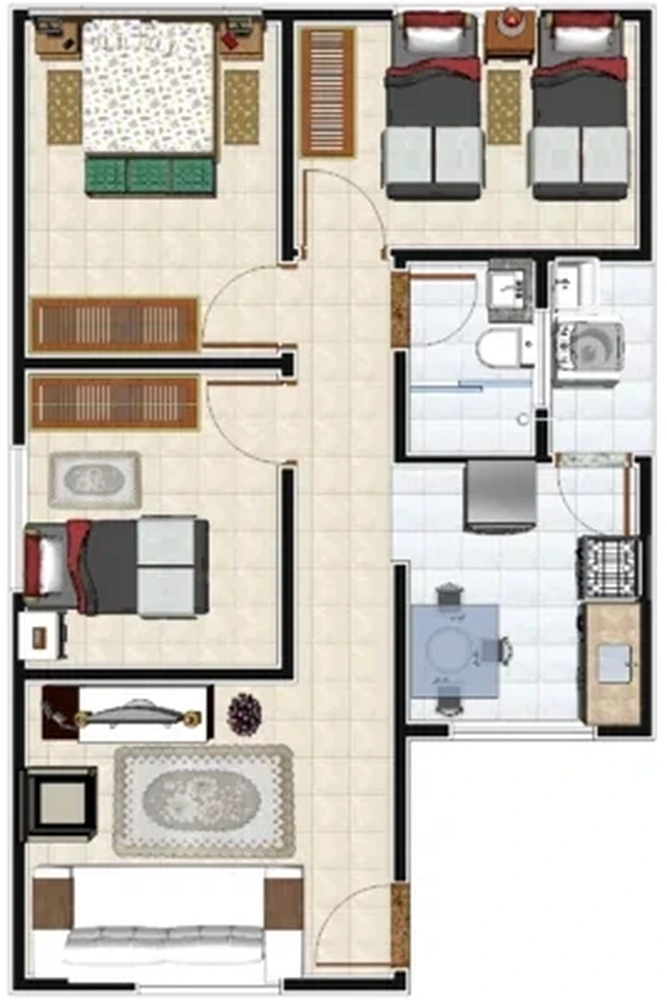
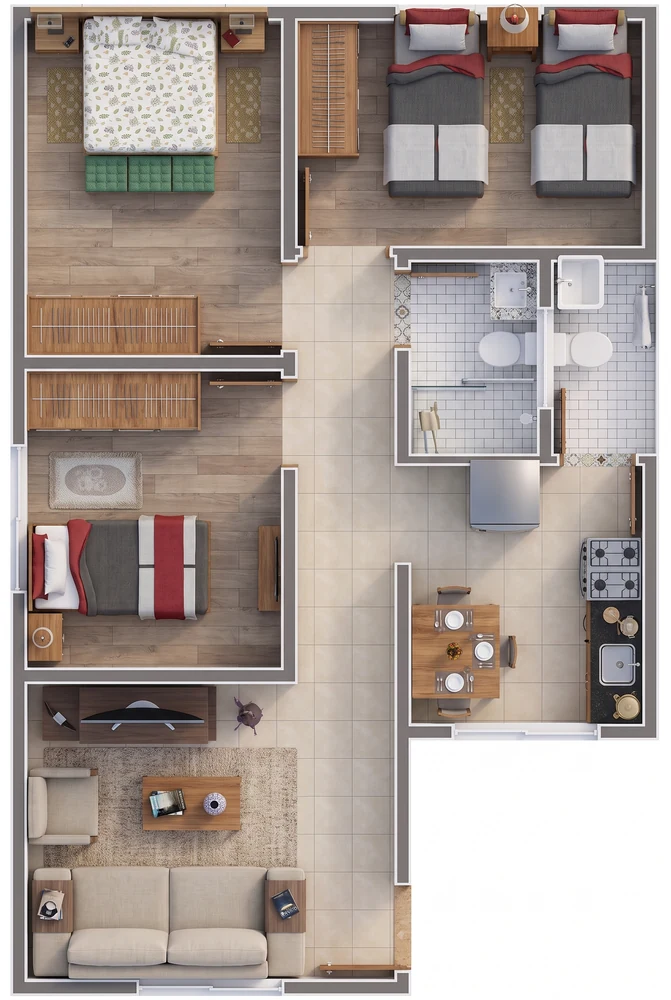
Before
After
Works with image exports from any design software
A plan exported from any of these.
- SketchUp
- Revit
- Archicad
- Rhino
- Chief Architect
- Vectorworks
- AutoCAD
- Blender
FAQ
Floor plan to render, answered.
Yes. Walls and openings are kept where they are; only finishes, furniture and shadows are added. The plan is a presentation image, not a construction document.
Other features
Ten ways to start. One render you can present.
- RenderingFrom CAD to final image in three clicks.
- Sketch to renderFrom a hand drawing to a photorealistic final image.
- Floor plan to renderA line plan becomes a furnished, textured plan.
- Photo to renderAn existing facade renovated, an existing room furnished.
- Improve renderThe same scene, more realistic.
- Elevation to renderThe same elevation, with materials, glass, shadows and sky.
- Section to renderThe same section, with materials, furniture, light and sky.
- Landscape designThe same place, from the same camera, with a designed garden.
- Create from scratchStart from a description, with no image at all.
- Resolution enhancerMore resolution, original render untouched.
Then, on the result
- Style transferApply any aesthetic without touching the geometry.
- Render editorSelect an area and swap materials on the spot.
- Atmosphere controlChange the light without redoing the scene.
- Furnish a roomFurniture in an empty or dated room.
- AnimationsFrom still image to cinematic in seconds.
- History and exportAll your work saved and organised.